Contact Form

Name

Email *

Message *

Showing posts with label Tutorial. Show all posts

Sunday, September 14, 2014

How to Install Windows Xp Sp2/Windows 7/Vista/8 With USB

Overview

When you download Windows 7 from Microsoft Store, you have two options: You can download a collection of compressed files, or you can download an ISO file. An ISO file combines all the Windows 7 installation files into a single uncompressed file.
If you choose to download an ISO file so you can create a bootable file from a DVD or USB drive, copy the Windows 7 ISO file onto your drive and then run the Windows 7 USB/DVD Download Tool. Then simply install Windows 7 onto your computer directly from your USB or DVD drive.Only The Universal Infor- mation technology brings to you.
When you download the ISO file, you must copy it onto a USB or DVD. When you're ready to install Windows 7, insert the USB drive or DVD with the ISO file on it and then run Setup.exe from the root folder on the drive.
This allows you to install Windows 7 onto your machine without having to first run an existing operating system. If you change the boot order of drives in your computer's BIOS, you can run the Windows 7 installation directly from your USB drive or DVD when you first turn on your computer. Please see the documentation for your computer for information about how to change the BIOS boot order of drives.

Making copies

  • To install the software, you can make one copy of the ISO file on a disc, USB flash drive, or other media.
  • After you’ve installed the software and accepted the license terms that accompany the software, those license terms apply to your use of the software. The license terms for Windows 7 permit you to make one copy of the software as a back-up copy for re-installation on the licensed computer. If you do not delete your copy of the ISO file after installing the Windows 7 software, the copy of the ISO file counts as your one back-up copy.
If you need to download the software again, you can go to your Download Purchase History in your Microsoft Store account and access the download there.

Installation

To install the Windows 7 USB/DVD Download Tool:
  1. Click to open the Windows 7 USB/DVD Download Tool page.
  2. Click Download then Run.
  3. Follow the steps in the setup dialogs. You'll have the option to specify where to install the Windows 7 USB/DVD Download Tool.
You must be an administrator on the computer on which you are installing the Windows 7 USB/DVD Download tool. It requires the Microsoft .NET Framework version 2.0 or higher.
System requirements
  • Windows XP SP2, Windows Vista, or Windows 7 (32-bit or 64-bit)
  • Pentium 233-megahertz (MHz) processor or faster (300MHz is recommended)
  • 50MB of free space on your hard drive
  • DVD-R drive or 4GB removable USB drive
For Windows XP users
The following applications must be installed prior to installing the tool:
  • Microsoft .NET Framework 2.0 must be installed. It can be downloaded here.
  • Microsoft Image Mastering API v2 must be installed. It can be downloaded here.
To make a copy of your Windows 7 ISO file:
  1. Click the Windows START button, and click WINDOWS 7 USB/DVD DOWNLOAD TOOL in the ALL PROGRAMS list to open the Windows 7 USB/DVD Download Tool.
  2. In the SOURCE FILE box, type the name and path of your Windows 7 ISO file, or click BROWSE and select the file from the OPEN dialog box. Click NEXT.
  3. Select USB DEVICE to create a copy on a USB flash drive or select DVD disk to create a copy on a DVD disk.
  4. If you are copying the file to a USB flash drive, select your USB device in the drop-down list and click BEGIN COPYING. If you are copying the file up to a DVD, click BEGIN BURNING.
When your Windows 7 ISO file is copied to your drive, install Windows 7 by moving to the root folder of your DVD or USB drive, and then double-click Setup.exe.
Screenshots for help your help.


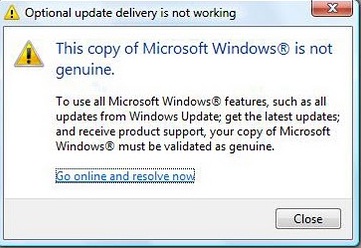
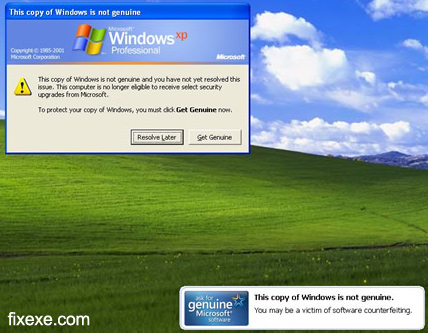

How to Remove Windows Genuine Advantage Notification in windows XP and 7 without any software

Windows Genuine Advantage (WGA) notifications occur when your computer hasn't passed the validation test. The validation test can be failed because you installed a pirated non-genuine copy of 7 or XP, or because you have changed your 7 or Windows Xp product key to a software-generated key, or sometimes it just happens for no reason at all. However, you can easily get rid of these annoying notifications yourself.


  1. 1
    Run as an administrator with no other user accounts running.
  2. 2
    Launch Windows Task Manager (Processes). Leave it open.
  3. 3
    Navigate to to C:\Windows\System32, and find WgaTray.exe.
  4. 4
    Right-click on WgaTray.exe, and select Delete. Leave the deletion confirmation box open.
  5. 5
    Go back to Windows Task Manager and click Wgatray.exe.
  6. 6
    Click End Process. When you are prompted for a confirmation to terminate the process, align the “End Process” confirmation box with the previous “Delete File” confirmation box, or at least have them close together. Do this because you'll need to do both actions quickly — at least within 2 or 3 seconds.
  7. 7
    Click Yes in both boxes, quickly. Click on Yes on the Task Manager prompt (to “end the process”) and then quickly press Yes on the deletion confirmation (to delete the actual file). You’ll need to repeat this if you miss it.
  8. 8
    Launch the Registry Editor. Click Start, then Run, and enter regedit.
  9. 9
    Browse to the following location:HKEY_LOCAL_MACHINE\SOFTWARE\Microsoft\Windows NT\CurrentVersion\Winlogon\Notify
  10. 10
    Delete the folder WgaLogon and all its contents.
  11. 11
    Reboot Windows 7.
  12. 12
    Check your work. As a precaution, after you have followed the above instructions:
    • Go to Control Panel > Security Center > Automatic Update Settings.
    • Select the third option, “Notify me but don’t automatically download or install them."
    • Click OK.
    • The next time the “Windows Updates” icon appears in the system tray, click on the icon and it will display a list of available updates. Windows won’t automatically download and install them anymore.
    • If “Windows Genuine Advantage Notification Tool” is there, uncheck it and press enter to download everything else (if you want to). You can right-click to “hide updates” that you don’t want.
    • Select “Don’t notify me about these updates again”, so that they will be ignored every time updates are downloaded.
    • Just remember, from now on, make sure to check the list of downloads so that you don’t install any new versions of this “tool”.

Sunday, August 31, 2014

How to install Windows Xp through USB

...If You Want To Install Windows Xp Through USB You have to follow some easy Steps...

1.Download Bittorrent and install it.


2.Download PowerIso Full version From below image... 


3.Install Power ISO And Then Register It...
4.Download BOOT.IMG.
5.Then Open PowerIso and go to action>Boot>Add Boot Information.And open boot.img that you download from above.
6.After this Add Files Of Windows Xp to POWERISO.
7.Click on Save and save as .ISO.
8.After All Above Process...
9.Download Rufus By clicking here...
10.Enter Your USB of At Least 2 GB.
11.Set Refus From Fat32 to NTFS.
12.Select your ISO of Windows Xp and Click on Start..
13.Wait 20-35 mins.
14.After Finalizing reboot your computer.
15.boot from usb and then enjoy.

Saturday, August 30, 2014

How to get Unlimited Google Plus + Followers

So, without wasting time lets get started. This trick can get you around 100-1000 followers daily. Note that the followers are 100% real people, no bots and they follow you manually. I've shared 2 different methods to get followers. Try them both and do share your experiences in the comments section.

 " Follow Others to get Followed "

Followers Trick 1- Steps to Follow

This trick is very easy to apply and takes no more than 5 minutes to get everything done. 

Open up Google+. Make sure there are no restrictions on your profile.
Search for #SharedCircles.  The results will come up with a long list of various Google+ Circles shared publicly. 
Trick to get Unlimited Google+ Followers


Trick to get Unlimited Google+ Followers

Here comes the tricky part. 

All you have to do is just, select any circle with around 200+ members and click on ADD people button. (You can also read the circle description to know more about it).

Trick to get Unlimited Google+ Followers
You can create a new circle or add them to any of your exisiting circles. I recommend making a new circle everytime. 

After you create the circle, you will start getting followers. Here's a snap showing my 1 day Google+ Notifications. 80% of the notifications I get are of followers. 


Unlimited Google+ Followers

Trick to get Unlimited Google+ Followers


Additional Tips

  • You can add only 1 circle a day. Adding more may lead to temporary restrictions on your profile
  • Apply this Trick on alternative days. 
  • You can also search for keywords like:  
  • #CircleOfTheDay
    #SharedPublicCircles
    #SharedCircle
    #PublicCircle

Followers Trick 2- Steps to Follow

The main advantage of this trick is that it gives you targetted followers. All you have to do is just some 10-15 minutes research.

Go to CircleCount and click on Specials<< Circles as shown in the picture, you will find 4 different options.

Trick to get Unlimited Google Plus Followers

Here are the links: 
Open up any link, a list of some of the best Circles will be displayed. Different stats of the circles like Followers, +1s, Comments, Reshares are also displayed. 

Enter your Keyword in the Search Bar and get a list of Circles related to your search. This way you can find circles related to your niche.

Trick to get Unlimited Google Plus Followers
Search for your keyword


You can also view different stats of a Circle by clicking Details button. 
Trick to get Unlimited Google Plus Followers
List Of Circles

Trick to get Unlimited Google Plus Followers
All Stats of a Circle

Select any Circle of your niche having huge engagement and add the circle following the steps explained in Trick 1.

So to conclude, Find Active Circles related to your niche and Add them using the steps given above. You will then get followed back by around 50% members of that particular circle.

Advantages of these Tricks

There are a lot of advantages of using this trick, let me list some of them: 
  • Having more Followers will make your profile look more professional 
  • You will start getting Shares on your posts 
  • It will boost your visibility on Google+ 
  • It will help you get more plus ones.
  • Get Great content in your Streams.
I hope you all enjoyed this trick of mine. Do share it with your friends and other bloggers. If you are getting confused, do let us know in the comments. We will try to solve your queries.

BONUS

As with my Last trick of FREE Google+ Votes, this trick can also be used to earn some money. There are many people out there on Fiverr and SEOCLERKS looking for Google+ Followers. So why not target them and earn money. Sell this trick to them and get some money into your accounts. 

Tuesday, August 26, 2014

How to remove Micro SD card Password?


MICRO SD Memory Card Password Recovery / removing 4 method. 

Solution 1:

For Symbian Mobiles:
1. Download and Install  FExplorer
2. Insert your card into your phone, without accessing it through the phone
3. Run FExplorer and Open the path C:\system
4. Find the file called mmcstore, and rename it mmcstore.txt
5. Copy that file (mmcstore.txt) to your PC and open it in Notepad
6. Your password will be located within that file.

Solution 2:

For Symbian Mobiles:

1. Download and Instal X-Plore
2. Now open the X-Plore and press Zero(0) then check you have marked the
    "Show the System Files".
3. After you done the above step now go to the file:
    C:/Sys/Data/Mmcstore
4. If you found the above path then press the option "3" to set the Hex-Viewer.
5.  Now look the third column you can see the code like ! TMSD02G (c ??”? x???3?3?3?3?3) 
Now see the characters between '?' because it is your password 33333.
6. You mayn't able to access the path file:
    C:/Sys/Data/Mmcstore
    if you don't set the password for the memory card. 


Solution 3:

For Micro SD:
Put the card in any E series mobile or N95 etc and format it.

It will not ask for a password.

Solution 4:

1. Go to file manager on your mobile 
2. In Settings choose system folders, 
3. In the System folder, find a file called mmcstore 
4. Send the file to your PC using IR/Bluetooth 
5. Open the file in Notepad 
6. The password you need for your memory card is located within that file

All Product Keys of Windows 8 and 8.1 For Free

product keys for windows 8 100% working product keys for windows eight

Windows 8 is one of the most elegant operating windows ever made by Microsoft.

Why Windows 8 is special?
Windows 8 is special because of its advanced user interface , the new start menu is itself a great feature of windows eight.Windows eight is a true high graphics version of windows.Windows 8 Is a evolution of all versions of windows by Microsoft.

Windows 8 serial Keys Below Download


Need Of Product Keys?


To Unlock full version of windows 8th you have to buy its serial keys or product 

keys from market because it is a premium os by microsoft.So to enjoy full features 

of windows 8th you need a product key to unlock its premium features.


But the problem is that its serial keys that are free are not working well.So today I 

made a collection of top 100% working windows 8 serial keys.You can use these 

serial keys in different languages and versions of windows 8th.All these keys are 

genuine and working.So you don't need to buy a product key from market.


Checkout the list below:


Windows 8.1 serial key : ultimate edition

NTTX3-RV7VB-T7X7F-WQYYY-9Y92F

Windows 8 OS key : Professional edition

XKY4K-2NRWR-8F6P2-448RF-CRYQH

Windows 8 product key : Release preview

TK8TP-9JN6P-7X7WW-RFFTV-B7QPF

Windows 8 product number : Consumer preview

DNJXJ-7XBW8-2378T-X22TX-BKG7J

Windows 8 OS key : Developer’s preview

6RH4V-HNTWC-JQKG8-RFR3R-36498

Windows 8 product key : Developer’s version

Y8N3-H7MMW-C76VJ-YD3XV-MBDKV

6RH4V-HNTWC-JQKG8-RFR3R-36498

4Y8N3-H7MMW-C76VJ-YD3XV-MBDKV

MBFBV-W3DP2-2MVKN-PJCQD-KKTF7

28VNV-HF42G-K2WM9-JXRJQ-2WBQW

NF32V-Q9P3W-7DR7Y-JGWRW-JFCK8

Windows 8 serial key : English

DNJXJ-7XBW8-2378T-X22TX-BKG7J

Windows 8 software key : Chinese

DNJXJ-7XBW8-2378T-X22TX-BKG7J

Windows 8 serial number : German

DNJXJ-7XBW8-2378T-X22TX-BKG7J

Windows 8 unique serial number : French

DNJXJ-7XBW8-2378T-X22TX-BKG7J

Windows 8 product key : Japanese

DNJXJ-7XBW8-2378T-X22TX-BKG7J

Window 8 Serial Keys 100 % Working

2GVN8-TV3C2-K3YM7-MMRVM-BBFDH

967N4-R7KXM-CJKJB-BHGCW-CPKT7

84NRV-6CJR6-DBDXH-FYTBF-4X49V

RRYGR-8JNBY-V2RJ9-TJP4P-749T7

ND8P2-BD2PB-DD8HM-2926R-CRYQH

XWCHQ-CDMYC-9WN2C-BWWTV-YY2KV

BDDNV-BQ27P-9P9JJ-BQJ96-KTJXV

KNTGM-BGJCJ-BPH3X-XX8V4-K4PKV

F8X33-CNV3F-RH7MY-C73YT-XP73H

967N4-R7KXM-CJKJB-BHGCW-CPKT7

HNRGD-JP8FC-6F6CY-2XHYY-RCWXV

84NRV-6CJR6-DBDXH-FYTBF-4X49V

BDDNV-BQ27P-9P9JJ-BQJ96-KTJXV

CDQND-9X68R-RRFYH-8G28W-82KT7

DWV49-3GN3Q-4XMT7-QR9FQ-KKT67

F2M4V-KFNB7-9VVTW-MVRBQ-BG667

F8X33-CNV3F-RH7MY-C73YT-XP73H

GPTCC-XN297-PVGY7-J8FQY-JK49V

HV3TW-MMNBG-X99YX-XV8TJ-2GV3H

J6FW2-HQNPJ-HBB6H-K9VTY-2PKT7

KQWNF-XPMXP-HDK3M-GBV69-Y7RDH

MMRNH-BMB4F-87JR9-D72RY-MY2KV

N4WY8-DVW92-GM8WF-CG872-HH3G7

ND8P2-BD2PB-DD8HM-2926R-CRYQH

RRYGR-8JNBY-V2RJ9-TJP4P-749T7

VHNT7-CPRFX-7FRVJ-T8GVM-8FDG7

84NRV-6CJR6-DBDXH-FYTBF-4X49V

BDDNV-BQ27P-9P9JJ-BQJ96-KTJXV

967N4-R7KXM-CJKJB-BHGCW-CPKT7

KQWNF-XPMXP-HDK3M-GBV69-Y7RDH

F2M4V-KFNB7-9VVTW-MVRBQ-BG667

CR8NP-K37C3-MPD6Q-MBDDY-8FDG7

39DQ2-N4FYQ-GCY6F-JX8QR-TVF9V

VHNT7-CPRFX-7FRVJ-T8GVM-8FDG7

GPTCC-XN297-PVGY7-J8FQY-JK49V

HV3TW-MMNBG-X99YX-XV8TJ-2GV3H

CDQND-9X68R-RRFYH-8G28W-82KT7

7HBX7-N6WK2-PF9HY-QVD2M-JK49V

D32KW-GNPBK-CV3TW-6TB2W-K2BQH

NBWPK-K86W9-27TX3-BQ7RB-KD4DH

2NF99-CQRYR-G6PQ9-WYGJ7-8HRDH

F7BDM-KTNRW-7CYQP-V98KC-W2KT7

4JKWV-MNJCY-8MW3Q-VJYGP-DC73H

KQWNF-XPMXP-HDK3M-GBV69-Y7RDH

MMRNH-BMB4F-87JR9-D72RY-MY2KV

N4WY8-DVW92-GM8WF-CG872-HH3G7

ND8P2-BD2PB-DD8HM-2926R-CRYQH

RRYGR-8JNBY-V2RJ9-TJP4P-749T7

FFX8D-N3WMV-GM6RF-9YRCJ-82KT7

2CMGK-NMW4P-B846H-YXR6P-27F9V

D2GBF-NGBW4-QQRGG-W38YB-BBFDH

NTVHT-YF2M4-J9FJG-BJD66-YG667

GBJJV-YNF4T-R6222-KDBXF-CRYQH

4NMMK-QJH7K-F38H2-FQJ24-2J8XV

84NRV-6CJR6-DBDXH-FYTBF-4X49V

3NHJ7-3WWQK-4RFTH-8FHJY-PRYQH

988NM-XKXT9-7YFWH-H2Q3Q-C34DH

TGXN4-BPPYC-TJYMH-3WXFK-4JMQH

N9C46-MKKKR-2TTT8-FJCJP-4RDG7

Q4NBQ-3DRJD-777XK-MJHDC-749T7

2VTNH-323J4-BWP98-TX9JR-FCWXV

D7KN2-CBVPG-BC7YC-9JDVJ-YPWXV

2GVN8-TV3C2-K3YM7-MMRVM-BBFDH

4NMMK-QJH7K-F38H2-FQJ24-2J8XV

76NDP-PD4JT-6Q4JV-HCDKT-P7F9V

7HBX7-N6WK2-PF9HY-QVD2M-JK49V

REMEMBER ME IN YOUR PRAYERS AND ENJOY!....IF NOT 

WORK THEN COMMENT ME.


Subscribe to our Newsletter

Contact our Support

Email us: silenttiger512@gmail.com

Our Team